Clear Linux* OS on DigitalOcean*
This guide explains how to import a Clear Linux* OS image to DigitalOcean and then deploy a VM instance.
Prerequisites
Set up a DigitalOcean account.
Create an SSH key on your client system that you will use to remote into the VM. You can follow the DigitalOcean’s SSH key creation guide.
Add Clear Linux OS Image to DigitalOcean
Before you can deploy a Clear Linux OS instance on DigitalOcean, you need to add an image since it’s currently not available in its marketplace. You can use our pre-built image or you can build your own custom image.
Use pre-built image
Note
Our cloud images (clear-<release version>-digitalocean.img.gz) for DigitalOcean are considered Beta until we finish setting up our automated testing of the images against the DigitalOcean environment. Apart from the initial version, clear-31870-digitalocean.img.gz, we cannot guarantee that future versions and updates to the initial version is problems-free.
Copy the URL for clear-31870-digitalocean.img.gz.
Skip to the Upload image section.
Build custom image
For this method, you need a Clear Linux OS system to generate an image using the clr-installer tool.
Add the clr-installer and gzip bundles.
sudo swupd bundle-add clr-installer gzip
Create an image configuration YAML file. See Installer YAML Syntax for more information on the clr-installer configuration YAML syntax.
cat > clear-digitalocean.yaml << EOF
#clear-linux-config

# switch between aliases if you want to install to an actual block device
# i.e /dev/sda
block-devices: [
   {name: "bdevice", file: "clear-digitalocean.img"}
]

targetMedia:
- name: \${bdevice}
  size: "800M"
  type: disk
  children:
  - name: \${bdevice}1
    fstype: ext4
    options: -O ^64bit
    mountpoint: /
    size: "800M"
    type: part

bundles: [
    bootloader,
    openssh-server,
    os-cloudguest,
    os-core,
    os-core-update,
    systemd-networkd-autostart
  ]

autoUpdate: false
postArchive: false
postReboot: false
telemetry: false
legacyBios: true

keyboard: us
language: en_US.UTF-8
kernel: kernel-kvm

version: 0
EOF
The settings that are required in order to make the image work on DigitalOcean are:
os-cloudguest bundle: Allows DigitalOcean to provision the image with settings such as hostname, resource (CPU, memory, storage) sizing, and user creation.
legacyBios: true: The image need to support legacy BIOS to boot on DigitalOcean.
Generate the image.
sudo clr-installer -c clear-digitalocean.yaml
The output should be
clear-digitalocean.img.Compress the image with gzip to save bandwidth and upload time.
gzip clear-digitalocean.imgThe output should be
clear-digitalocean.img.gz.Note
bzip2 is the other compression format DigitalOcean accepts.
Upload image
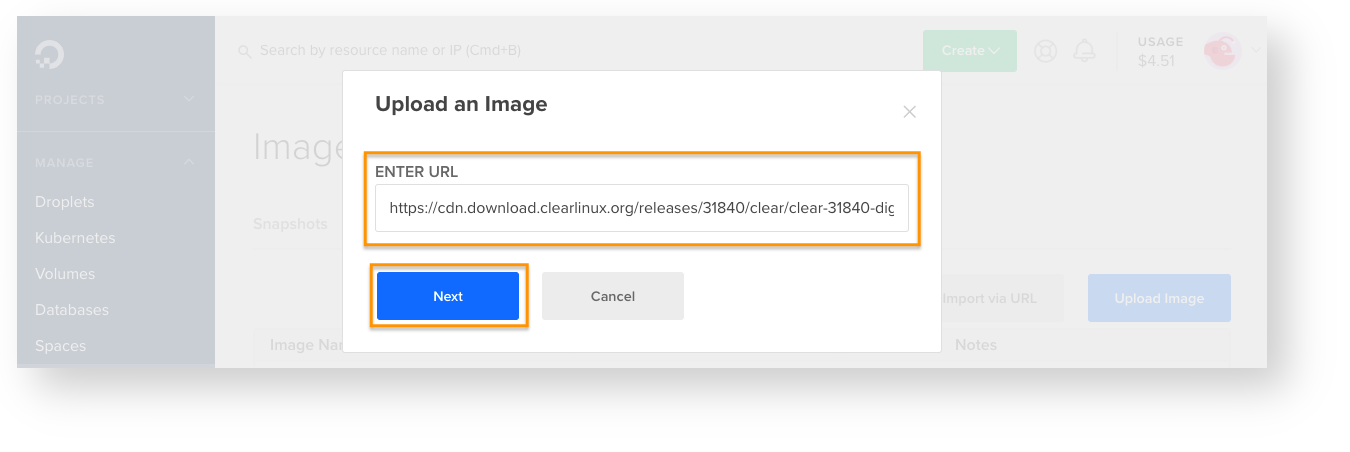
On DigitalOcean’s website, go to .
See Figure 1.

Figure 1: DigitalOcean - Upload custom images
Select an upload method.
Set the DISTRIBUTION type as Unknown.
See Figure 3.
Choose your preferred datacenter region.
Click Upload Image. Wait for the upload to finish before proceeding to the next section.

Figure 3: DigitalOcean - Set image distribution type, region, tag
Create and Deploy a Clear Linux OS Instance
On DigitalOcean’s website, go to and then click Create Droplet.
See Figure 4.
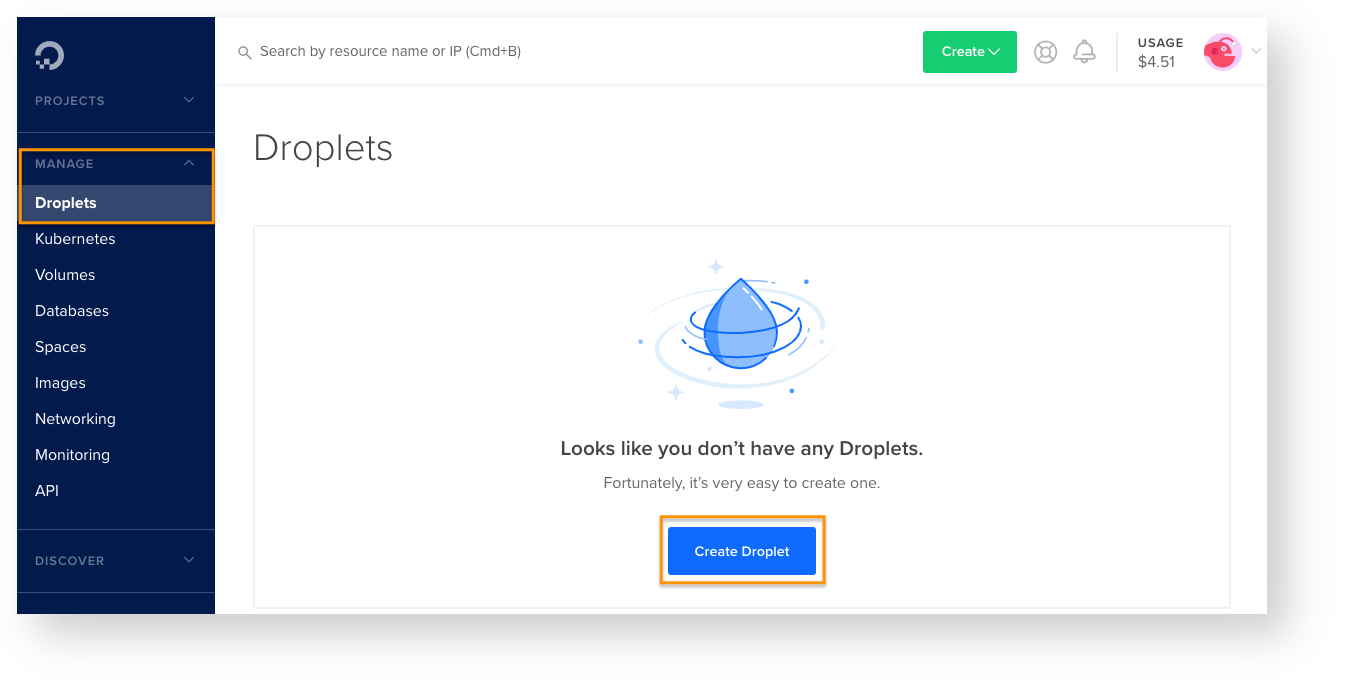
Figure 4: DigitalOcean - Create Droplet
Under Choose an image, select Custom images.
See Figure 5.
Select your uploaded Clear Linux OS image.
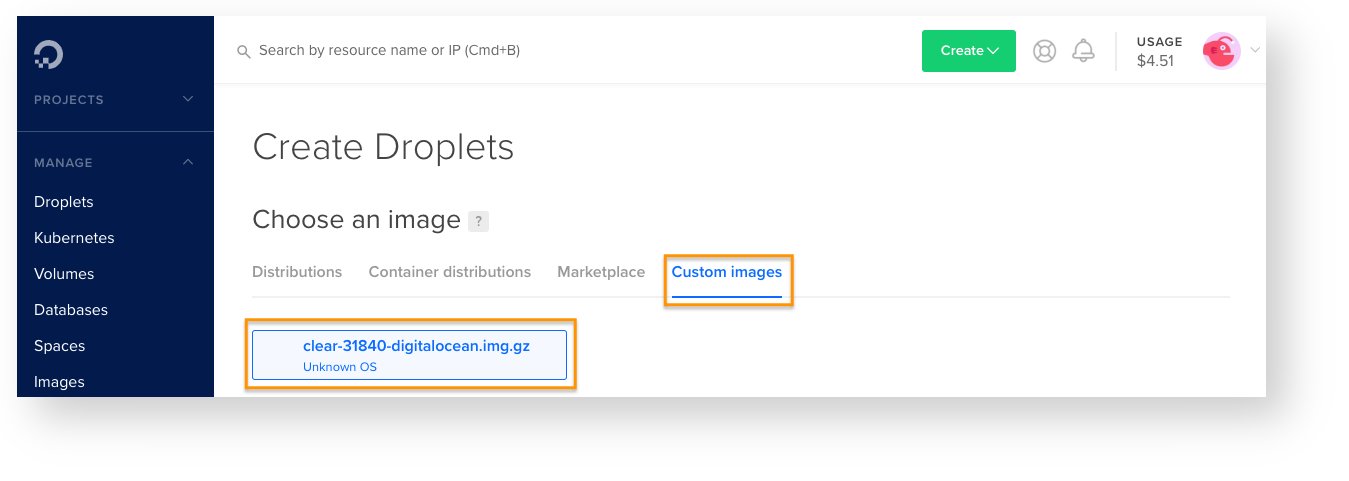
Figure 5: DigitalOcean - Choose custom image
Under Choose a plan, select your preferred plan.
See Figure 6.
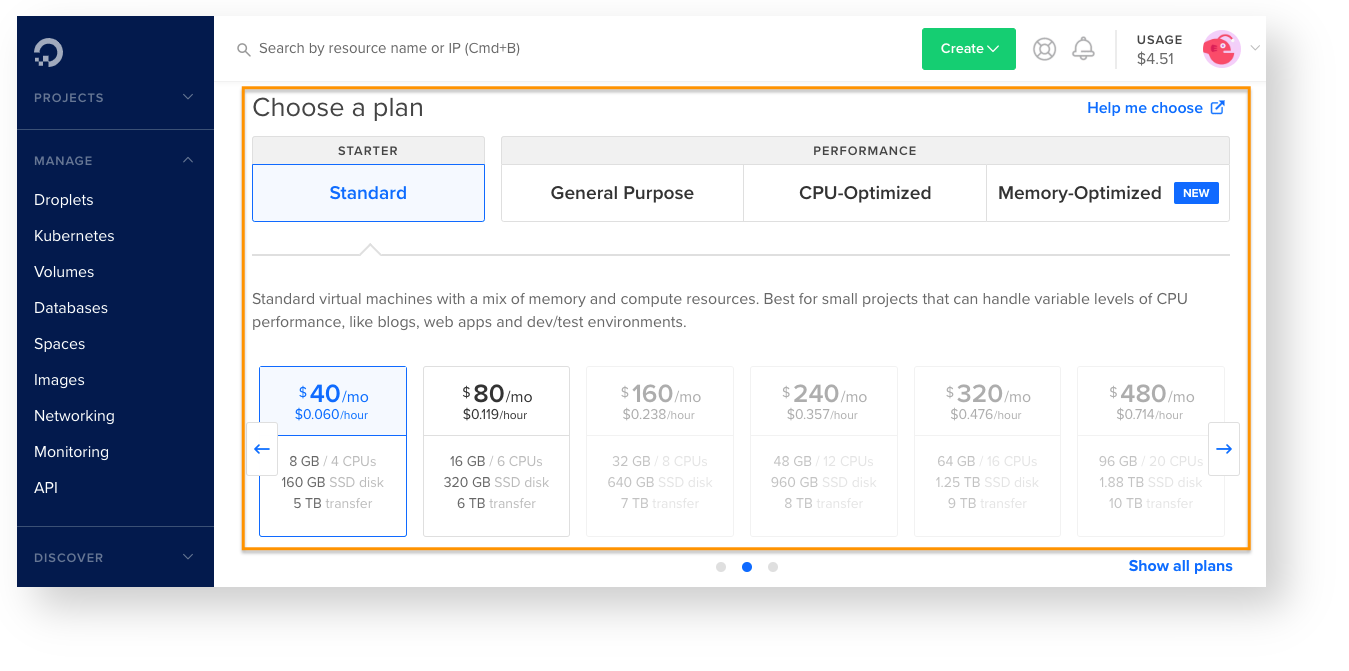
Figure 6: DigitalOcean - Choose plan
Under Choose a datacenter region, select the region you want the instance deployed to.
See Figure 7.
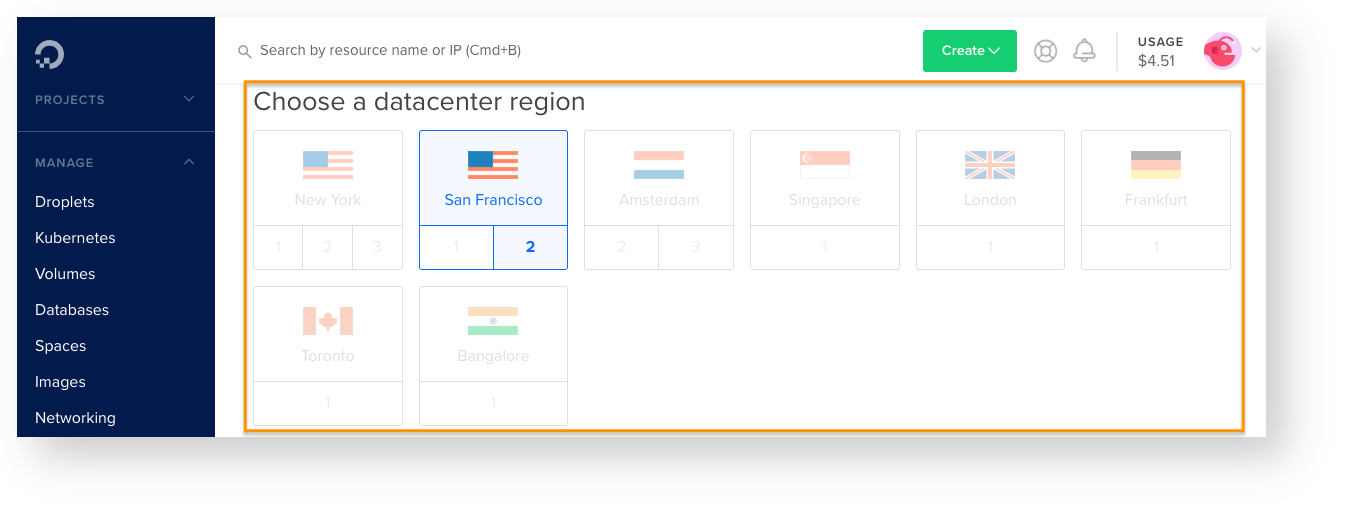
Figure 7: DigitalOcean - Choose datacenter region
Assign SSH key to default clear user.
By default, the user clear will be added to the instance and an SSH key must be assigned to this account.
Under Authentication, select SSH keys and click New SSH Key.
See Figure 8.
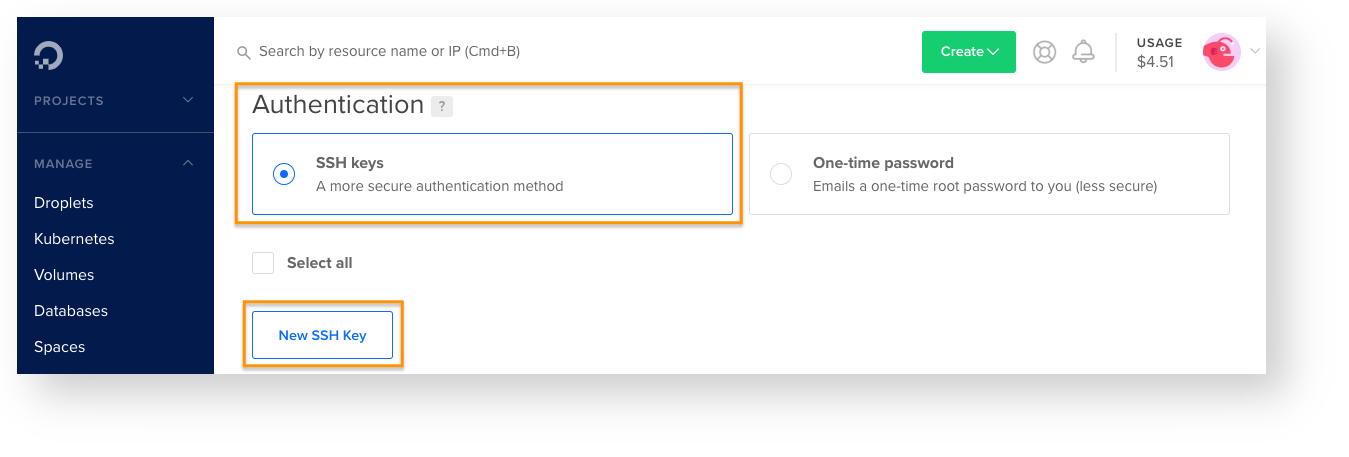
Figure 8: DigitalOcean - Add SSH key
Copy and paste your SSH public key in the SSH key content text field.
See Figure 9.
Give a name for the SSH key.
Click Add SSH Key.
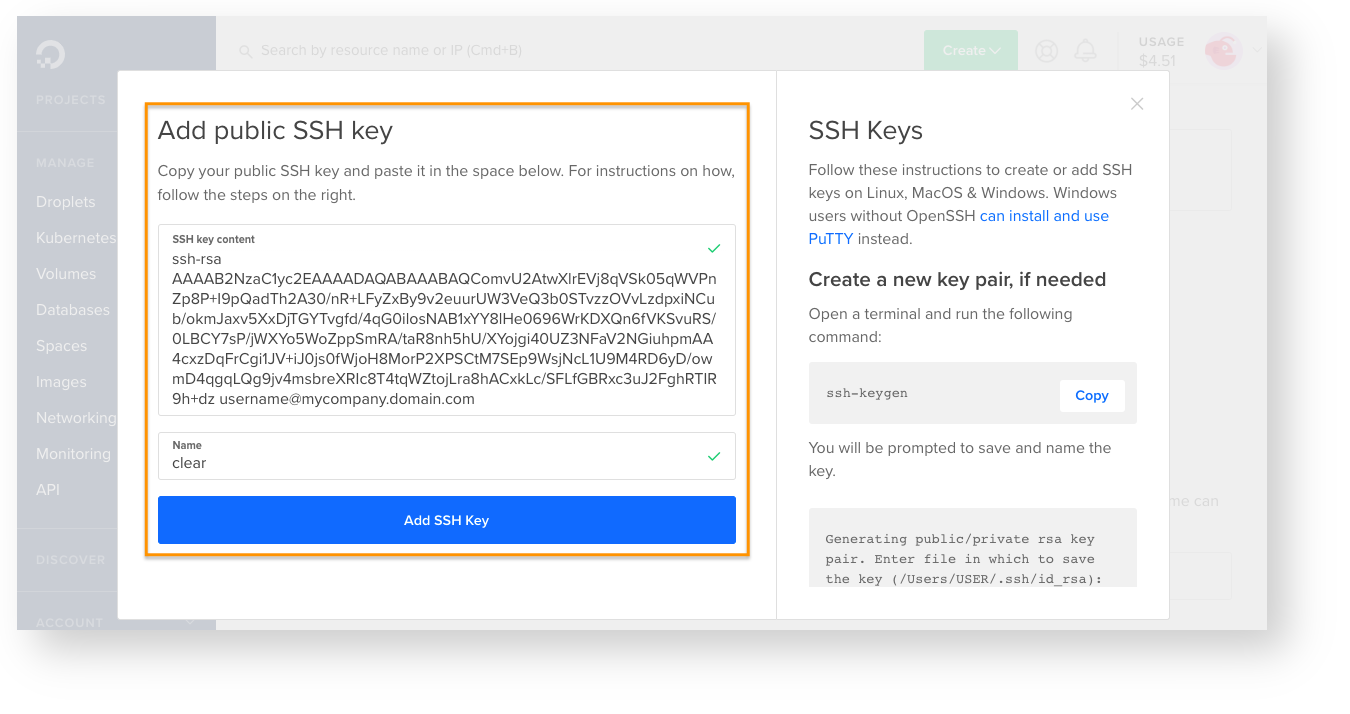
Figure 9: DigitalOcean - Add public SSH key
Note
If you need to add additional users to the instance, you can do that wth a YAML-formatted cloud-config user data script. For more information on cloud-config scripting for Clear Linux OS, see our subset implementation of cloud-init called micro-config-drive.
Under Select additional options, select User data.
Add your YAML-formatted cloud-config user data in the field below. Here is a simple example:
#cloud-config

users:
- name: foobar
  gecos: Foo B. Bar
  homedir: /home/foobar
  ssh-authorized-keys:
    - ssh-rsa AAAAB3NzaC1yc2EAAAADAQABAAABAQC65OihS4UP27xKOpqKWgT9
      mgUNwEqhUEpTGGvopjT65Y/KU9Wfj6EYsdGzbHHcMUhFSTxAUAV4POH5d0LR
      MzI7sXMe528eCmpm2fTOHDDkVrurP/Jr2bjB9IrfSMkBYS8uRd603xNg/RDq
      EH3XzVeEDdEAxoej0mzsJ2UkQSBi+PD1J7JeCbX2lsb55x2yWzaUa+BTai7+
      /TU4UabTRDtFTiXhx2rImSSguofDISVll6W5TTzbGmHdoEI+8DIAFU66ZgC9
      SzL75LQi1YAWlj5XG+dXhN6Ev6KFM34odvWdxeCj0jcx5UIXcieBfOuLujEH
      dVybwNLG7hxDy/67BA1j username@mydomain.com
  sudo:
    - [ "ALL=(ALL) NOPASSWD:ALL" ]
Under Finalize and create:
Set the number of instances you want to deploy.
Set the hostname for the instance.
See Figure 10.
Click Create Droplet to deploy the instance.
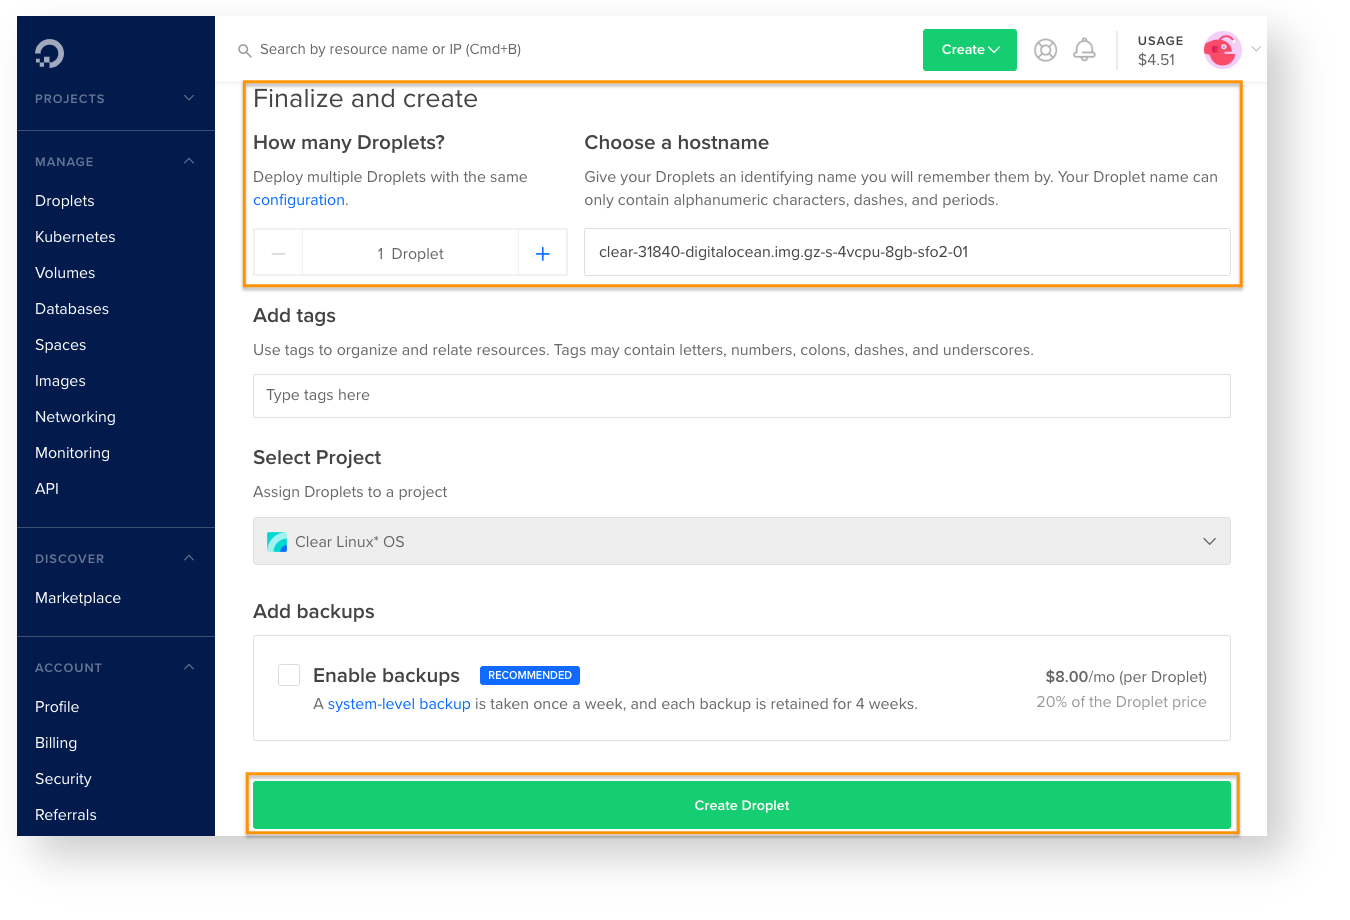
Figure 10: DigitalOcean - Finalize and create Droplet
Connect to Your Clear Linux OS Instance
On DigitalOcean’s website, go to .
See Figure 11.
Get the IP address of your Clear Linux OS instance.
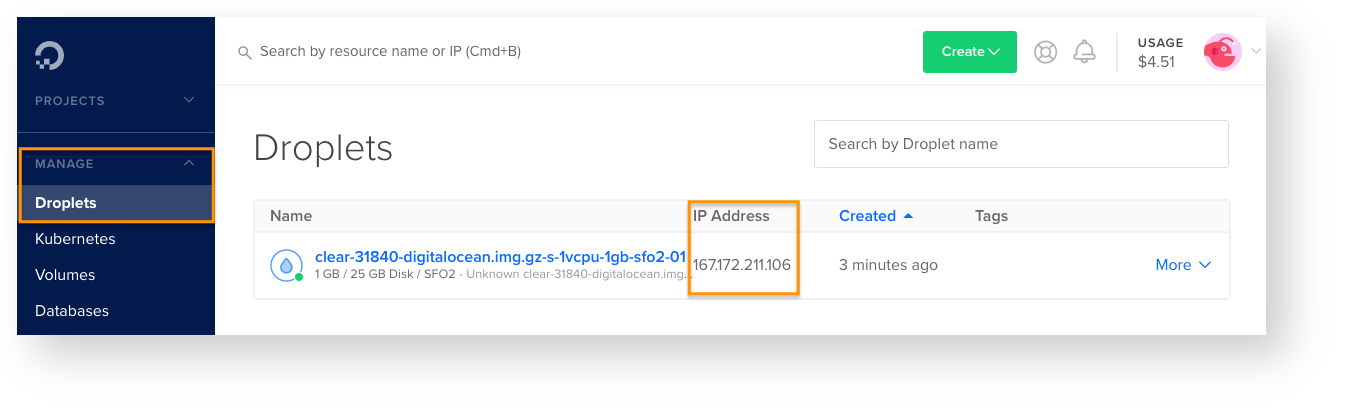
Figure 11: DigitalOcean - Get Droplet IP address
On your client system, SSH into your instance. For example:
ssh clear@<IP-address-of-instance> -i <SSH-private-key>